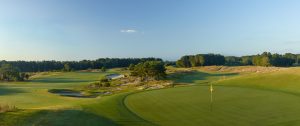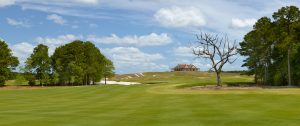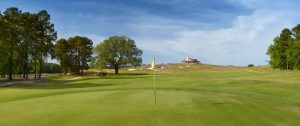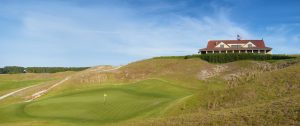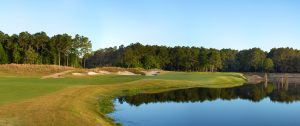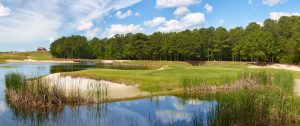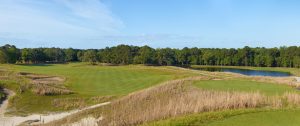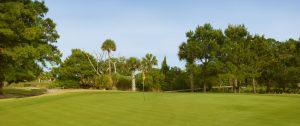
Any description of the Bulls Bay Golf Club must be prefaced by a brief discussion of the overall design philosophy behind this Mike Strantz creation located just north of historic Charleston, overlooking its namesake body of water and the Atlantic Ocean. Because of its coastal setting, Bulls Bay plays as differently as the winds that sweep across its fairways and dunes. As is the case at so many of golf’s great links courses, how one plays each hole is predicated on the wind conditions on a particular day.
“Par,” while a necessary guideline, can be more of a suggestion than a dictate at Bulls Bay. Given certain conditions, a par 5 can be a drive and a mid- or even short-iron while a medium length par 4 can require two mighty blows. A shift in the wind’s direction and intensity can turn those same two holes into a definite “three-shotter” and a drive-and-a-pitch. Bunkers that can be carried downwind can become unreachable into the wind. While this is true in some degree at any golf course, it is the rule rather than the exception at Bulls Bay.
Only once – at holes 4 & 5 – in the entire routing do two consecutive holes play to the same point on the compass. By comparison, even Shinnecock Hills, to many experts the finest example of links architecture in America, has consecutive holes playing in the same direction twice, once on the front nine at the second and third holes and again on the back, at 11 and 12.
To accommodate the ever-changing conditions, the architect has purposefully designed Bulls Bay with wide fairways and green complexes that, for the most part, allow for a variety of approach shots. Therefore, it follows that attempting to define the “preferred” way to play any given hole at Bulls Bay would be as futile as attempting to define all the playing conditions that can exist in this links setting. So the following is a hole-by-hole description of Bulls Bay, rather than a player’s guide. How a player attacks the golf course will be as different as the wind off the Bay and therein lies the heart and soul of the Bulls Bay Golf Club. It is this variety of conditions and strategy that will continue to challenge and entertain golfers for countless rounds to come.
Hole # 1, Par 4, 465 – 421 – 382 – 314
Right from the first tee, the golfer is introduced immediately to the overall character of Bulls Bay. Playing from an elevated tee, a wide fairway stretches out some 50 feet below. A lone fairway bunker just inside the slight dogleg right sits 310 yards from the Maverick or back tees. A drive left of the bunker will leave an approach to a generous, but fairly flat green guarded by a solo bunker in front.
Hole # 2, Par 5, 597 – 582 – 516 – 445
A U-shaped par 5 wrapping counter-clockwise around a scenic lake, the second hole requires both solid thought and execution. Better players may opt for less than driver, depending on conditions. But regardless of club, the perfect tee shot played with a gentle draw will reach past the waste bunker, which ends about 255 yards off the tee. From there, most players will lay up, leaving a short iron to a horizontal green guarded by several bunkers in front. But the aggressive player can shorten the yardage and reach this green in two with a long second shot played directly across the lake. From this angle, the green presents a more vertical target with the bunkers now right of an open approach.
Hole # 3, Par 3, 170 – 161 – 151 – 123
This par-3 features alternate greens that present contrasting challenges. The narrow green to the left, framed by ancient live oaks and sand bunkers on both sides, is a vertical target that demands accuracy of line. The wider, more elevated green to the right offers a more horizontal target that places more premium on distance control because of a grass hollow in front of and expansive sandy waste behind the green.
Hole # 4, Par 5, 530 – 512 – 442 – 360
With the Waterway and Bulls Bay now on the right, the fourth hole starts with a tee shot over a finger of marsh and a serpentine waste bunker that extends the length of the fairway on the right. A solitary live oak in the fairway is 282 yards off the back markers. The best tee shots will be played left of the oak, setting up a favorable angle if one is to reach a horizontal green fronted by that same waste bunker. If this hole isn’t reachable in two, the best second shots will be played left, avoiding the waste bunker and setting up a variety of shots into a green that sits at grade.
Hole # 5, Par 4, 406 – 391 – 374 – 334
From a tiny island tee tucked into the marsh, the player confronts a modified “cape” design where waste bunker, not water, defines the carry on this left-to-right dogleg. True to its design convention, this cape hole invites the player to bite off as much of the bunker as he desires. Too conservative and the drive will find the back side of a ridge that runs across the fairway, leaving a longer approach. But a slight fade off the tee will be rewarded by the same ridge, catching the downslope and bouncing right, even farther up the fairway. The green, guarded by sand to the left, is deep and narrow at the front, widening toward the back.
Hole # 6, Par 5, 611 – 543 – 518 – 427
A third par 5 on the front nine – the course features five par 5s and five par 3s – is the longest hole on the course. A tee shot across a wetland must be fit between a formal bunker on the right and a long waste area left. From there, the best second shot will carry a corner of the waste area well up the left side and find the fairway which has taken a slight jog to the left around a small stand of pines and more sand to the right. The third shot is played to a green 45 yards deep and flanked by a formal bunker on the left. Controlling one’s distance into this green is critical because of a pronounced ridge that separates the green front to back at its midpoint.
Hole # 7, Par 3, 186 – 166 – 149 – 127
A kidney-shaped green wraps around a pond to the left, presenting a formidable but inviting target to a player who can hit a controlled draw. The contour of the green will help that same draw reach a back left pin. But bail too far right and a bunker guarding the front corner of the green comes into play.
Hole # 8, Par 4, 393 – 366 – 334 – 307
A dogleg right, the eighth tempts some to cut off yardage with a big fade off the tee. But a waste bunker and a sentinel oak tree guard the corner and punish errant drives. A prudent play is a fairway wood to the corner of the dogleg, leaving a short-iron approach to a wide green benched into a slope, a deep sand bunker guarding the front and a grassy hill rising at the back.
Hole # 9, Par 4, 377 – 351 – 335 – 302
Playing back toward the clubhouse, the ninth climbs the same elevation that benefited golfers on the first tee. The hole plays as a gentle dogleg left with a bunker narrowing the left side of the fairway at the 300-yard mark. Dunes obscure the right portion of a fairway that is wider than it looks from the tee. When the pin is left, players will benefit from a drive that finds that hidden portion of the fairway. But regardless of position, the key to success at No. 9 is taking enough club to negotiate the elevation change since the green is well above the landing area. Another key to the hole is the ridge that divides the smallish green left to right.
Hole # 10, Par 5, 635 – 587 – 556 – 526 – 490
Now back atop the hill that dominates the Bulls Bay landscape, the player begins the back nine with a dramatic, downhill tee shot to a generous fairway. The bunker to the right is only 230 yards off the back tee, providing more of a reference than a hazard. But the bunker inside this dogleg right is 295 to carry. The second shot asks the player to be aggressive and go right at a green left unguarded in front. Any shot that avoids fairway bunkering to the left has a chance to roll onto a green that features plenty of contouring. Bail out to the right on the second shot away from the bunker and you’ll face a short but very difficult third shot to a green that slopes away from right to left.
Hole # 11, Par 4, 437 – 416 – 350 – 330
Any description of this medium length par 4 must begin where the hole ends – at the green. At first glance, the 65-yard-deep – that’s right, sixty-five – putting surface would seen far too generous for an approach shot with a medium to short iron. But play the hole once and you understand the architect’s theory. This is really two greens in one, a prominent ridge cutting across the putting surface, left to right, at its waist. The result is two concave targets that can mean as much as four-clubs’ difference on the approach shot.
Hole # 12, Par 3, 171 – 147 – 120 – 100
A distinctive two-level green presents the target at this scenic one-shot hole. Playing over water that wraps around more than half the green complex, the 12th usually requires only a short iron. But with sand surrounding virtually all of the putting surface and water awaiting the more errant shot, the hole demands accuracy. A steep slope defines the front third of the green and can be used as a backstop in attacking front pin placements.
Hole # 13, Par 5, 580 – 558 – 505 – 431
A double dogleg right, this par 5 can be – and has been – reached in two. But certainly, the smart play here is a three-shot attack. A bunker 280 yards off the tee provides a good aiming point for the drive. Depending on wind, a drive toward or even right of the bunker safely avoids a small creek that meanders along the right side of the fairway before cutting across the front of the green just beyond the second dogleg. The second shot needs to fly far enough to “see” around the second bend and set up a short approach across the creek to a wide, shallow green with bunkers to the right and across the back. An obvious nose protruding into the middle of the green from the back places a premium on the third shot. Players who must negotiate the nose with their first putt will find two-putting difficult.
Hole # 14, Par 3, 190 – 170 – 156 – 146
Golfers familiar with Ballybunion and Waterville may have to remind themselves that they are still in the Lowcountry as they stand on the tee at this par 3 and survey the green cut into the hillside before them. Playing decidedly uphill, the 14th reveals only part of the flagstick and none of the putting surface to the player. But the target is generous and the slope behind the green collects anything long and can actually roll a ball back onto the putting surface. But miss the green to the right and deep bunkers, set well below the green, make recovery difficult.
Hole # 15, Par 4, 446 – 406 – 386 – 367 – 323
Climbing up from the 14th green, the golfer is back at the highest point on the property, preparing for a tee shot played dramatically downhill, like those at the first and 10th holes. But even more dramatic is the view from this lofty tee. From here, as many as 15 holes are visible, as are four barrier islands and associated inlets, the Waterway and the Atlantic beyond. Turning one’s attention to the task at hand, the 15th appears as a diagonal fairway running away from right to left before making an abrupt turn to the right between two sentinel oaks within the last 100 yards. The trees frame a second shot played to a green turned on a similar diagonal and guarded by sand to the right and at the left front.
Hole # 16, Par 4, 438 – 368 – 341 – 321 –– 308
The same lake that added beauty but did not come into play at the last hole is the dominant feature at 16. From the back tee, a drive must carry a natural wetland and a corner of the lake which flanks the entire right side of the landing area. A good drive will leave a mid-iron approach – again depending on the wind conditions – to a green cradled into a hollow between sand in front and slopes in back. From other tees, players have the option of driving over the lake, a carry of roughly 230 yards, setting up a short approach from right of the green, with the greenside bunker complex now to the left of the target.
Hole # 17, Par 3, 183 – 157 – 142 – 134 – 124
Straightforward and seemingly benign, the 17th is a par 3 where the beauty of the design is defined by its simplicity. Here, the architect created a diagonal target where the green’s direction and contour match the left-to-right slope into which it is set. The preferred shot would appear to be a slight fade, but a large bunker stretching across the right side of the diagonal green awaits even the slightest mis-hit.
Hole # 18, Par 4, 465 – 429 – 404 – 394 – 340
A dogleg left, the finishing hole at Bulls Bay plays to a dramatically elevated green as golfers approach the clubhouse for the final time. But first, the drive must carry a bunker 225 yards off the back tee if one is to shave the dogleg. The bunker through the dogleg, to the right of the fairway, is more than 300 yards out. From the landing area, the hole climbs sharply to a small, round green that is the flattest on the course, a good chance for a closing birdie with an accurate approach. But to reach the final green, one must avoid a series of bunkers set into the hill, factor in the elevation change and, as always, correctly judge the ever-present wind. Do all of that and one might earn the kudos of fellow members enjoying the view from the clubhouse verandah.

